MG-Cars.info
MG MG Y Type D Lamp connection routing BBS discussion at MG-Cars.info

MG-Cars.info
Welcome to our Site for MG, Triumph and Austin-Healey Car Information.
Recommendations
Parts
MG parts spares and accessories are available for MG T Series (TA, MG TB, MG TC, MG TD, MG TF), Magnette, MGA, Twin cam, MGB, MGBGT, MGC, MGC GT, MG Midget, Sprite and other MG models from British car spares company LBCarCo.
MG MG Y Type - D Lamp connection routing
| Advice would be appreciated with this.
I am wiring the rear lamps at the moment. What is the best way to route the wires inside the D lamps. The loom comes into the interior of the lamp, then indivual wires go to the bullet connectors for the bulbs. I am loath to have these wires just loose within the lamp body. I notice there are several holes in the lamp back plate. Should I take the individual wires out through one hole and back in through one, so looping them into the (fairly small) space between the lamp back plate and the spare tyre compartment lid? With LED's , which I plan to use, there should be little heating anyway. thanks KGM |
| K G Mills |
| The wiring passes into the D-Lamp through the flanged hole. There is a cutout in the divider to feed the wire to the number plate bulb. There should be no other holes in the D-Lamp backplate. They were originally mounted by two studs with nuts in each lamp. Are you fitting the reversing light in the LHS D-Lamp ?. Safety Fast Tony The Classic Workshop |
| A L SLATTERY |
| Hi Tony,
yes, am using the part clear lens and wiring to suit the reversing light on the near-side lamp. However, I spoke to my D lamps this morning about the wiring route you suggest, and they said very little. I did notice that they seem a little different from what you describe. They most certainly have holes in the back-plate, and no hole in the dividing fin. And since inclusivity is the new buzz word, I must accept then for what they are. So I shall run the wires through the holes and back up again. To ease my worries about the size of the space, I'll double up the gasket between the lamp back and the cover to the spare tyre compartment. I may even use a fiber glass sleeve on the wire. I'll see if that will fit. Probably just over thinking again. Thanks KG 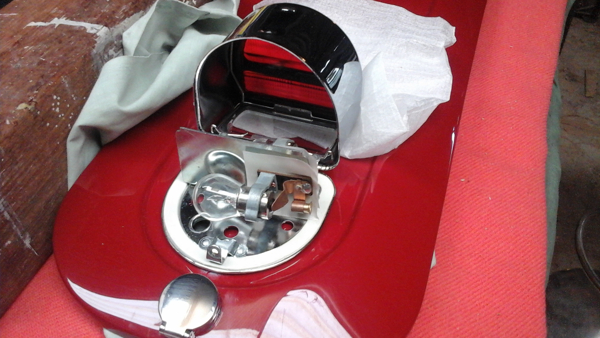
|
| K G Mills |
| Hi KGM. I can't answer your question directly other than not to worry too much about it. I cartainly wouldn't loop any wires through small holes in the back on the grounds that there is too much of a danger of chafing, especially if they are not fused. As one who is about to upgrade my rear lamps to LEDs as well as fit indicators inside the D Lamps and retain the reversing lamp I would like to raise a few more pressing problems which are going through my mind. Firstly I prefer to at least have the car looking original so separate indicators are out for me. Luckily the UK law allows this though I am sure there are many who would disagree on safety grounds. Using LEDs is bandied around as something that is as simple as fitting the appropriate bulbs. It isn't. For a start you will need to replace use the correct flasher unit. More importantly one question you have to answer is whether to keep the whole vehicle positive earth as double filament bulbs have one side of each filament connected internally. This is not a problem for incandescent bulbs which can work both ways round but LEDs only work one way round. Luckily positive earth BA5d LED bulbs are now available but don't appear to be available in red as far as I can see. White bulbs, which are available, can of course be used but don't give such a good red light when shone through the original red glass in our lights. Red behind red would be better, in my opinion. Playing with various combinations I have come to the conclusion that some white LED bulds in combination with some red lenses gives a sort of orange tinge which is useful here as modern indicators are orange anyway so using a double "filament" LED in white covers both the number plate/indicators and side lights. How to incorporate the reversing lamp I don't yet know. A triple "element" bulb perhaps? The real problem of course, which some of you may have noticed, is the difficulty of upgrading the single pole BA5s bukb holder to double BA5d ones. The lack of space in the light bodies makes all of this very difficult and has pushed some people to either give up or turn to very high tech solutions using custom made inserts though I have yet to see an insert which supplies both reversing lamps and indicators while addressing the colour change. I could go on but don't want to confuse myself even more. I will get there though.
Ian |
| ian thomson |
| Hi Ian,
you raise quite a few good points about the issues involved in putting LED's and indicators on a YT. Franz Tenbrock has a discussion of how he had to comply with local regs, and we have something analogous here. Our indicators have to be , to the near inboard edge of the lamps, 600mm apart for the indicators. Well our D lamps just fail on that by a few centimeters. But the Australia ADR's actual say to the center of the lamps. So I would have o check if they would be permitted here before I committed to that path. Secondly, they are yellow/orange, not red on the rear. The latter requirement sort of rules out using the same double filament bulb or equivalent LED with whatever lens, for both the indicator and stop light./ You are right about the colours. You probably know all this-- Incandescent bulbs have a warm light, a lot of energy in the red wavelengths. White LEDs don't. So behind a red lens, which selectively transmits red, the incandescents do well, while white LEDs loose out and come through as a much dimmed yellow/orange. I am still unsure where I am heading, though the compromise I an leaning towards, is to just restore the D-lamps to their original functions, but with red LED's for the brake, and maybe incandescent bulbs for the taillight/number plate lamp. Staying with the incandescent bulbs gives me a good white light on the number plate, and red for the tail lamp, but a warm LED if it exists would do as well. As to indicators, I think I'll use chrome lamps on stalks, similar I guess to what Anton has done. I also need dual outboard reflectors. There are a number of rear bumper LED/reflectors that have tail light /brake lamp functionality while retaining reflector capability. Smallish rectangular ones (eg Mazda CX5 or 9 ) could be mounted just above or below the bumper bar, (must be >350mm above the ground in one diagram, 250mm in another. So again would have to check since below the bumper might be better.) Then I would wire the extra taillights and brake lights to improve the rather minimal array of lights in the original specs, and also to give a redundancy in the event of failure of one lone brake light. I would keep these outboard lights detachable. The flasher relay and whatever dashboard switches and telltales are required, I still have to sort. As you point out, the relays and the LED's have to be matched. Ideas range up to using an arduino or similar to give me self cancelling indicators, simple enough as a timer, but do-able as well with a sensor on the column somewhere. But when all is considered, the car will be driven very little anyway, so a simple arrangement is probably the way to go. Do you have any knowledge of that? AS to routing the wires within the lamps, I don't have much choice but to go through the base plate and back up again. The base on these particular lamps is recessed and not planar, so there is quite a gap there. I have taped the wires on the back plate too, (with a "Denso" Over-wrap tape actually, which is a bit like a gaffer tape on steroids.) That gives me fixity to keep the wires where I want them when fixing the lamps and will also stop movement thereafter. Using LED's for the brake light keeps the current down for the brake light switch, and keeps temperatures down too. I will watch with interest to see how you handle all this. regards KG |
| K G Mills |
| Hello Kevin
you all have seen what I did in the other forum i have developed my own board to which the wires are connected very cleanly now i will also print a warning light switch so that it does not destroy the dashboard optically, ,with led lighting so that the regulations are all complied with for the ya who has the winkers you can also turn off the winkers selectively the circuit board you can etch yourself is simple and costs little, you only have to print the board layout with the laser on foil best double ev some lines with a black pen and then etch the board but i can also send you a board. as a letter is faster than as a package ;-) i hope you like the ashtrays i will print the knob for the hazard light switch with clear resin i love my printers and the possibility of freecad here my design for the knob want to drive my new YA this summer ;-) 
 |
| FT Franz |
This thread was discussed between 26/03/2021 and 20/04/2021
MG MG Y Type index
This thread is from the archives. Join the live MG MG Y Type BBS now