MG-Cars.info
Triumph TR6 Frame Off BBS discussion at MG-Cars.info

MG-Cars.info
Welcome to our Site for MG, Triumph and Austin-Healey Car Information.
Recommendations
Parts
TR parts and Triumph parts, TR bits, Triumph Car Spares and accessories are available for TR2, TR3, TR3A, TR4, TR4A, TR5, TR6, TR7, TR8, Spitfire and Stag and other TR models are available from British car spares and parts company LBCarCo.
Triumph TR6 - Frame Off
| As I have pursued this adventure of restoration I had planned to fashion a temporary frame onto which I would attach the bare tub to maintain ridgity and relative geometry while I worked on the chassis. When I removed the doors I made up a support bracket between the A and B posts on each side with a connecting bar welded between the two sides. My shop guy has advised that this reinforcement is sufficient to remove the tub for painting and to access the frame/chassis. Comments? Is this sufficient in the opinion of those of you who had done this or do I need to make up a frame to bolt the tub to while off the original frame? Thanks. db |
| Doug Baker |
| Could not attach photo earlier...too large. Now compressed, this shows the support at the A & B posts. Is this enough?? db 
|
| Doug Baker |
| The door supports are sufficient. When I did my frame-off, in my ignorance I didn't even use door supports and had no issues. Doug |
| Doug Campbell |
| Thanks Doug for benefit of your experience. This'll save me a bunch of $'s and weeks of work!! db |
| Doug Baker |
| Please provide magnify lens Maybe across the tub too? This is a friends tub holder he used 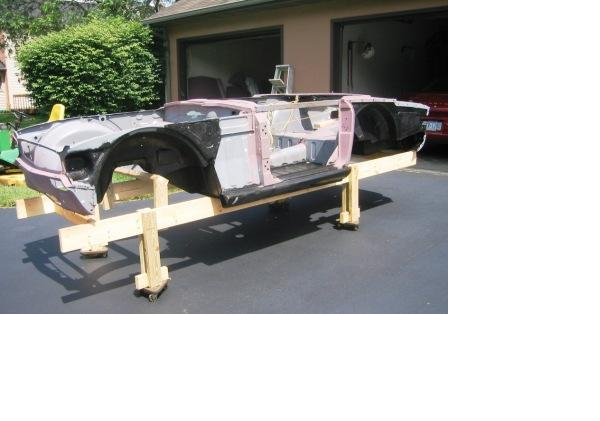
|
| Don Kelly |
| Doug- I shoot my pics @ 5meg. All you have today at that res is resize to 80% and you still get a good size pic |
| Don Kelly |
| Don, Sorry for the size of the photo. When the compression tool said smaller, I thought it just meant less resolution!! Mine is supported with a 1 1/2" angle iron welded from center of door across the transmission tunnel. The supports between the A & B posts is 1" channel steel welded to 1/4" plates that are bolted to the top hinge in the front and the striker plated in the rear. Figured the front and rear did not have a lot of weight and sort of just hung from the center anyway. db |
| Doug Baker |
| Should be fine . If I ever get that far you can do mine |
| Don Kelly |
| He, he...maybe we can trade Don. You do my wiring and I'll do your tub!! db |
| Doug Baker |
| Don, Maybe a better rendition... db 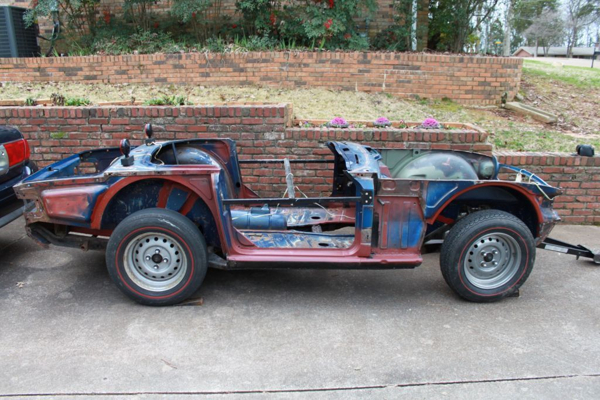
|
| Doug Baker |
| hi i did brace between the doors, across the "A" and "B" posts (90 degrees) and diagonal across from "A" and "B" posts, and I also measured the diagonal before I lifted the tub off. Les |
| lw gilholme |
| Way to go Doug! Didn't even notice there was a car there before Thought it was a shot of your drive |
| Don Kelly |
| Doug Just don't do what I did. I did no bracing and from moving the tub around to go for preliminary painting after welding it all up the doors wouldn't fit. (I wasn't as luckey as Doug Campbell I guess) I ended up having the body shop do the final fitting when I brought it for its final paint job. I dob't know what they had to do but they made it fit. |
| Michael Petryschuk |
| Hi Doug you have plenty of support. That is funny I could say the exact same thing as Doug Campbell did above. I had no front wings but did have the back ones on. I bought my project with the tub off the frame and moved it several times. It was flipped over several times while I worked on the top and bottom sides. Moved it even to take it out to be sand blassed then back to the body shop on the back of as flat bed pick up. Then it was lifted on all 4 corners and put on the frame for the final time. My car looks ok to me:) Rick PS Doug went down 79,77,then 95 so no way near you this year. Wanted to spend a day in Charleston SC. then Savannah for half a day. |
| Rick Crawford |
| Rick, Glad that you had a good trip. Great places to spend some time. Maybe on your way back in the fall?? db |
| Doug Baker |
| Well, tis done for good or nae!! Finally after quite a long while of inactivity the TUB's off and on to the frame!!! Anyone who's done this care to offer any advice as to what to do first and what not to ever do??? Thanks. db 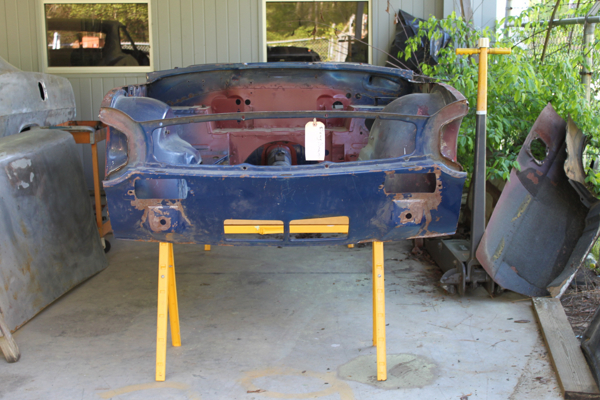
|
| Doug Baker |
| The frame db 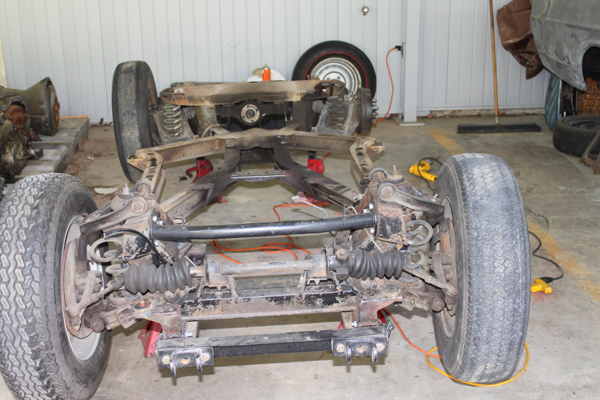
|
| Doug Baker |
| I would take everything off first |
| Don Kelly |
| Uh...Don. That's the plan and obviously the wheels come off first, but is there some order recomended to follow for all the pieces and parts? db |
| Doug Baker |
| I wouldn't thinks so, besides the obvious. Everything get PC'd ,correct?? |
| Don Kelly |
| That's the plan including the frame itself. Will begin in earnest this week. I'm planning to devote one evening 1700-2130 (Wed likely) and one afternoon (Sun)1300-1700 each week until I finish this effort!! db |
| Doug Baker |
| The best laid schemes of mice and men |
| Don Kelly |
| gan aft alay! Yeah I know. And in this case it's likley to be my loving spouse with ever pressing "honey-do's"!!! db |
| Doug Baker |
| Thought it was gang aft agley |
| Don Kelly |
| Aye Don, ye know Bobby better than I!! db |
| Doug Baker |
| Hi Doug I assume you know that you will need some method to compress the front springs before you remove the bolts on the lower wishbone. I used a 1/2 threaded rod and a 2x4 as a spring compresser. I took the lower and upper wishbones and control arm and rotor off as a unit and then dismantled that assembly on the bench. I think this is easier but to each his own. Remeber the lower trunion is a left hand thread on one side and a right hand thread on the other. Darn if I can remember which as I type this. Mark the flanges and drive axles (propeller shaft and rear axles) to be able to put them together on the same side and in the same place to keep them balanced if you are replacing the U joints. I don't know if it makes a big difference. I didn't do this but wonder if a vibration I get at around 56 mph is related to that. This vibration disappears at about 58 mph. (the tires are balanced). Mark how the rear trailing arm brackets are oriented to the frame to keep the rear wheel alignment. If you haven't already, make sure you reinforce the differential attachment bolts to the frame as they become weak and break. There are gussets plates available from most LBC outlets for this very purpose. The front lower wishbone brackets on the frame also benefit from reinforcement. I zinc dipped my frame. Gets inside and out for great corrosion resistance. Added about 20-30 pounds to the weight of the frame. I also used 3 by 3 square tube to replace the trailing arm attachment points as well as 1 inch square tube to replace the angled braces at the front - much more robust than the original thin steel. 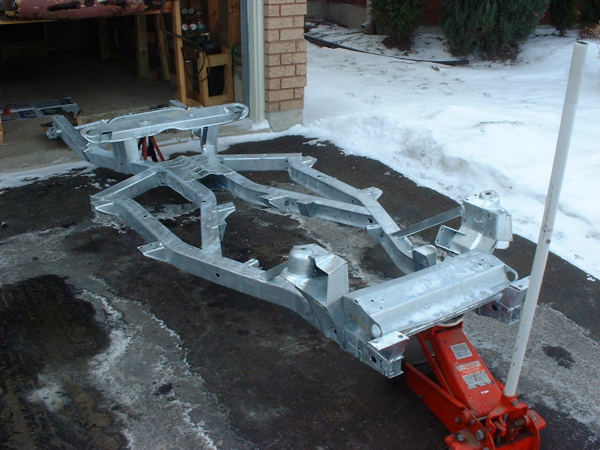
|
| Michael Petryschuk |
| Michael, thanks. All good advice. db |
| Doug Baker |
| And here I was going to add a comment and Mike said it all for me. I did almost the same with the front springs when I put them back on. I used big huge washers and double nut on the bottom end and did my turning of nut at the top. I do remember have to re and re the front springs as I recall missing or doing something wrong BUT do you think I can remember what it was? It was 12 years ago so I have a little excuse. I do recall dropping longish threaded rods (with nuts at the top) down the lower wishbone arms to guide the lower spring pans into position. This was kinda a scarry procedure. Mike and Doug, the rear axle u-joints can not be out 90* to one another as the inner and outer yokes are keyed to each other. The drive shaft UJs can be out 90* so watch this. I suggest you replace the trunnions with new. When ordering obviously ask for a left and right( 2 different part numbers). I think they are stamped with an L and R. Trunnions are oiled not greased. That is all I have to add. Rick Mike WOW I did not know you had done that to your frame. |
| Rick Crawford |
| I just used a jack and crossed my fingers. A lot harder with out the body that way. But,...makes the rod thingy easier |
| Don Kelly |
| Yep Rick. Wanted the frame to last longer than the tires this time. Problem I should mention with zinc dip is you can't easily weld on the frame and have to grind it off if you do. So do all the welding before you dip. It sure creates a rigid frmae. |
| Michael Petryschuk |
This thread was discussed between 19/03/2012 and 30/03/2012
Triumph TR6 index