MG-Cars.info
Triumph TR6 HELP!! Body Work BBS discussion at MG-Cars.info

MG-Cars.info
Welcome to our Site for MG, Triumph and Austin-Healey Car Information.
Recommendations
Parts
TR parts and Triumph parts, TR bits, Triumph Car Spares and accessories are available for TR2, TR3, TR3A, TR4, TR4A, TR5, TR6, TR7, TR8, Spitfire and Stag and other TR models are available from British car spares and parts company LBCarCo.
Triumph TR6 - HELP!! Body Work
| As most of you know, my restoration has been at a stand still due to frustration with Paint/body help. After waiting for a looonngg time, I decided to tackle the job myself. Have what's probably a stupid question to the knowledgeable folks here, but as y'all know stupidity oft does not me deter...!! I'm color blocking the boot lid. Keep getting a couple of high spots, a couple of which I've peened down and filled with putty; others are welds and don't lend themselves to flattening. Now I"ve skimmed most of the rear of the boot lid and have found a wide low area which suggest that maybe, just maybe the damn thing is not supposed to be flat all the way to the trailing edge. Would some kind soul enlighten me? Is the major (central) area of the boot lid flat (front to rear) to the trailing edge or is there an indentation/dip/etc. , maybe 3 " before and almost to to the trailing edge. I know that the sides curve up a bit on each side at the rear, but what about the central area? Please keep in mind that I've never done this before so be gentle!!@ Thanks. db |
| Doug Baker |
| I am not a TR6 owner, but what I have done when questions like this arose during my restoration, I am also a self-taught bodywork person, I looked at somebody else's TR2 and tried to make mine look like theirs. Al Christopher |
| A R Christopher |
| Doug The boot lid is totally flat to the back edge. It does have a VERY slight role (convex)left to right but no dip at all going to the back. Yes it does role up to the outside edges. Did you by chance sand blast this flat area? Rick |
| Rick Crawford |
| Al, Rick, thanks for responding. Al, I have NO other -6 with which to compare. Would that I did, this adventure would be a hell of a lot easier!! Rick, no, no sand blasting. Did soda blast it to clean metal. It appears that there may have been some minor damage at some point in the past and a repair attempted, leaving an area about 7" deep and maybe 20" across that's not perfectly flat just about in the middle of the lid. Thanks for the info. Now that I know it's supposed to be flat, I can work toward making it that way. Getting the high spots down and filling in the voids have consumed all my -6 time lately. 'Bout finished with the bonnet 'though it took 5-6 color sandings to get it reasonably flat where it needed to be. Smooth is eary...just use 600-800 grit paper!! Flat is another story. I'm pretty close on the boot lid. One or two more applications of filler and sanding ought to do it. Then a final primer and sealer and it's top coating time!@!@ I'm gonna learn auto painting...(I think)!! Missed matriculation at the local tech school Auto Body and Painting class, but may make the next semester just to make sure my mistakes are small ones and fixable. Have replaced the LF inner wing and the battery box so far. Working on the Driver's floor pan and inner rocker panels. Then only 3-4 more small holes to fill and Yahoo, I'll be ready to soda blast that sucker and get it into the paint booth!@! Fortunately I have access to a full shop set up and a generous and patient instructor who's agreed to overwatch my novice efforts. He's also doing the welding on my patch panels. db |
| Doug Baker |
| Doug Looks like something got dropped on the boot or the DPO sat on it! Rick |
| Rick Crawford |
| Rick, You may be right, but there are a couple of high spots in the "depressed" area too that suggests some repair activity. I peen down what I can, but where the two layers of metal are welded and the area is raised, only filling is possible. Don't want to grind away the sheet metal entirely. I'll try to get some photos up soon. db |
| Doug Baker |
| Doug, When I restored the body on my TR6 I sanded it down to bare metal. It's not necessary the you do it but in the process I found that some dips in the trunk lid that were filled with a light amount of putty. I believe the dips were from too much pressure on the rack that was mounted on the lid. Maybe yours had a rack at one time. When doing the smoothing and filling process I found that a long somewhat flexible sanding board worked great for keeping thing flat. Also some old time body guys told me about using a wooden pait stirring stick with sandpaper wrapped around it as a sanding block. It actually works great for flatting small areas. When I did mine I took a lot of info and help from this site that I'm giving you a link for. Get to the "Forum" section and you can discuss body work with some professionals that regularly contribute. http://www.autobodystore.com/home.shtml I've been through the mess getting mine done so if you have questions don't hesitate. Henry |
| HP Henry Patterson |
| Henry, Thanks for the link. I've been to the site before and downloaded a bunch of instructions which are proving helpful. I too use a wooden paint stirring stick but also bit the bullet and purchased a couple of heavy foam blocks from my local auto paint store. the 5 1/2X 11" block works very nicely with a full sheet of paper, but then for more "local" areas the paint stick is preferred. I think that there was a luggage rack on the lid at some time and may have contributed to the condition with which I'm dealing. Taking more body filler than I'd like to use, but it's good hard stuff. I quit using the putty w/o hardner and went to a professional product with both blue and red hardner so alternatinh with each iteration offers a different color to get back to. I can easily understand the high cost of paint/body work if all the hours I've spent were costed at some hourly labor rate like $50-$70/hr. Maybe that's why I got a $12-$14K estimate to do my painting!! db |
| Doug Baker |
| Great Doug.. sound like you're well on your way. I'm sure you've also discovered the different grades of filler. when I started out I was using the basic pink Bondo stuff on everything. Then the seasoned body guys set me straight about using the right filler for the particular purpose. For smoothing I found some stuff from Evercoat that worked great. I don't remember the name but it was for filling shallow small areas and thus was very easy to sand and most importantly "feathered" out nicely.. much better than trying to use the pink stuff for that. Good luck. Henry |
| HP Henry Patterson |
| Henry, I don't sxxx from shinola about which body filler is best for what. I've depended on the advice of my local auto paint store which deals only with the automotive market. One of my shop buddies had a single part putty that went on really smooth and feathered nicely. I tried a similar tube and it turned out to be a bitch to sand smooth. What I'm using now is a 2 part with a separate hardner that smooths pretty well but sets up really quckly. You have to be fast to get it mixed and applied before it starts to harden. What do you recommend for light fill in and fine feathering? db |
| Doug Baker |
| Doug, For the light fill and feathering I use Evercoat Metal Glaze Finishing and Blending polyester putty. It's your basic two part stuff. I used it for shallow dips and door dings and things like that. I also used it on top of other filled areas to feather out where the other stuff didn't feather well. I've uploaded a picture of my car all "spotted up" the Metal Glase is all the light colored fill. You can sort of see the other color putty underneath some spots where I had a deeper repair on the door. Henry 
|
| HP Henry Patterson |
| Wow Henry, Yours looks a lot different than mine:) Is your bonnet unlatched or is there a misalignment at the rear and if so how do you address that? Thanks for the info. I'll get some of the stuff. What I have now is a polyester glaze that again sets up somewhat too quickly. db |
| Doug Baker |
| Doug, Remember mine was down to bare metal.. but I'm sure yours is a "spotty" by now. The bonnet was unlatched. I was probably doing some panel alignment.. took me about 2 weeks to get everything aligned and gaps straight. Here's another upload.. Look how nice and flat that door is... a result of wide feathering and more sanding than I ever care to do again. Keep sanding my friend! Henry 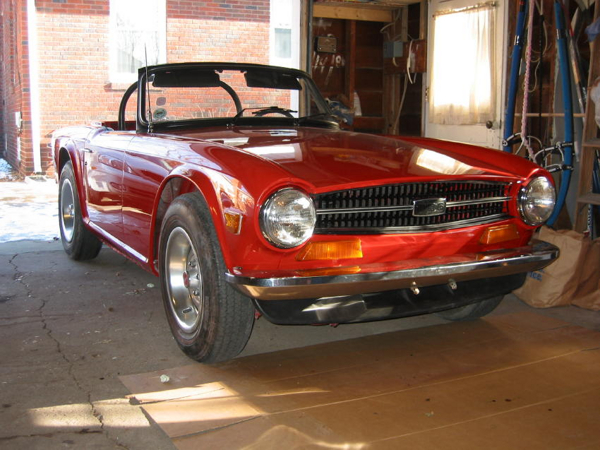
|
| HP Henry Patterson |
| Henry, Now that's impressive (except for the color). Great alignment. Your efforts obviously paid off well. I'm assuming that to achieve that you fiddled with the wing attachment bolts?? Why black for the front? Thought that'd be body color? db |
| Doug Baker |
| Doug, I had all of the wings off for removal of the paint(front and rear.)so yes, there was a lot of fiddling with attachments. It's tough to get them all to align. Lot's of trial and error with probably more error before getting it right. The only black on the front of the car should be the plastic air scoop or air dam. Is that what you mean? Henry |
| HP Henry Patterson |
| Yeah Henry, the whatyamacallit under the bumper. Would have thought that that'd be body color. When you aligned the front outer wings did you already have the bonnet in place as a reference point? I need to take out about the front 1/3 of the driver's floor pan. Rusted though from master cylinder leak. Should I do this BEFORE I refit the LF inner wing? It seems that the scuttle, floor pan and inner wing all come together as one piece of jigsaw. db |
| Doug Baker |
| Doug, Yes I aligned the front wings with the bonnet in place. I first got the wings aligned with the doors and then lined it up with the bonnet but then tweaking the bonnet and then back to tweaking the wings until it all came together. When I aligned the doors I had to use some bending techniques which kind of made me cringe at the time. Leaving the wing off to do the front half of the floor will give you a little better access to the floor from the outside but I'm not sure removal is necessary. Tom C. might have some guidance for you on that. Henry |
| HP Henry Patterson |
| Doug, I forgot to mention that you can adjust the bonnet alignment with it in the closed position by removing the grill. With the grill removed you have access to all of the hinge bolts. That way you can adjust it up and down, side to side and front to back. when I did that I took the latch off of the bonnet. |
| HP Henry Patterson |
| Henry, Great advice. Always good to hear from one who's been there and done that. Thanks. db |
| Doug Baker |
| Doug, If you plan to remove the seam sealer where the floor meets the scuttle , you may find that the rust has actually creeped up that pannel (just below the ribs).The driver's floor extends about 1/4" beyond the scuttle, and the scuttle makes an L shaped lip where both are spot welded together. What you didn't mention is how wide your rust is. Does it extend from the inner sill to the trans tunnel?. There is a tricky part where the arch opening for the trans meets the floor with a reinforcement piece. Also, don't forget your floor makes a right angle down to form the lower inner sill. So going back to removing the wing - if the rust extends to the inner sill and you need to replace the lower scuttle, then you should remove the wing then you can remove the baffle that is bolted on to the scuttle. There are many things going on here, I can suggest you start at the floor and work your way up. I try to get you pictures as needed. Oh,by the way, with the fender removed, you can also extend the drain tube from your vent so the water doesn't splash inside your wing. http://farm1.static.flickr.com/192/449034706_3fc52e3c5c_b.jpg (passenger side,kinda similar) http://farm2.static.flickr.com/1191/644191339_354ae3adcc_b.jpg 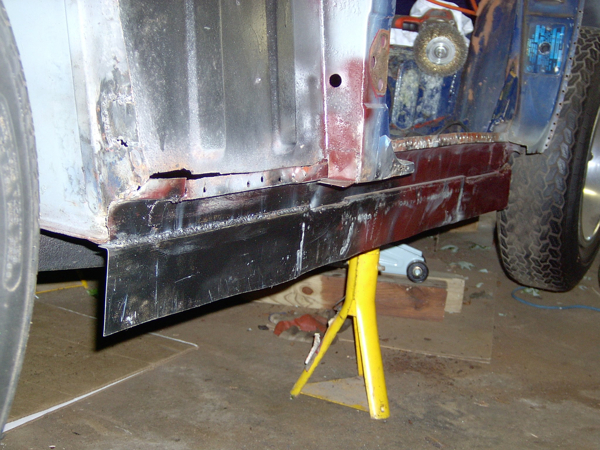
|
| Tom C |
| Tom, I'd appreciate photos. dbaker04ATaolDOTcom I removed the outer wings a long time ago and have finished them off the car. I fully intend to extend the scuttle drain hoses through the rocker panel or the splash guard. Still debating which'll be best. I've now removed the left inner wing which was misaligned from a previous poorly repaired fender bender. I'm replacing the inner wing. I chose to cut it just foreward of the baffle connection and butt weld the connection rather than get into removing the seams from the top of the scuttle which really is in good shape. The driver's pan is rusted through to the right side at the scuttle/wing/floor conection and about 6-8" to the rear; an area of maybe 8X10" to get to good metal all around. The inner rocker panel is sound. I have the whole floor pan, but its seems counter productive to try to replace the entire piece for what might be no more than about 20% of it. Tentatively I plan to cut across one of the high ribs just forward of the 4 bolt anchor on the left of the pan. My earlier question was should I do that repair BEFORE I weld in the inner wing since it appears that they all come together at the scuttle interface. I think the answer is yes...do the floor first, then the wing. I do have some deterioration where the floor pans turn up to mate with the outer rocker panel, but rather than try to replace the entire pan for that, I'll cut out and weld in replacement patches. The rest of the body work is a few holes that will require cleaning up and welding in a patch. None are larger than about 2" diameter, one in the floor of the boot. I'm sure that I'll find more when I soda blast the suspect areas, but it appears to be cut, patch, weld, grind smooth, seam sealer, prime and paint!! Lots of just plain getting it done. db |
| Doug Baker |
This thread was discussed between 17/09/2007 and 20/09/2007
Triumph TR6 index