MG-Cars.info
Triumph TR6 Rotten rear valence BBS discussion at MG-Cars.info

MG-Cars.info
Welcome to our Site for MG, Triumph and Austin-Healey Car Information.
Recommendations
Parts
TR parts and Triumph parts, TR bits, Triumph Car Spares and accessories are available for TR2, TR3, TR3A, TR4, TR4A, TR5, TR6, TR7, TR8, Spitfire and Stag and other TR models are available from British car spares and parts company LBCarCo.
Triumph TR6 - Rotten rear valence
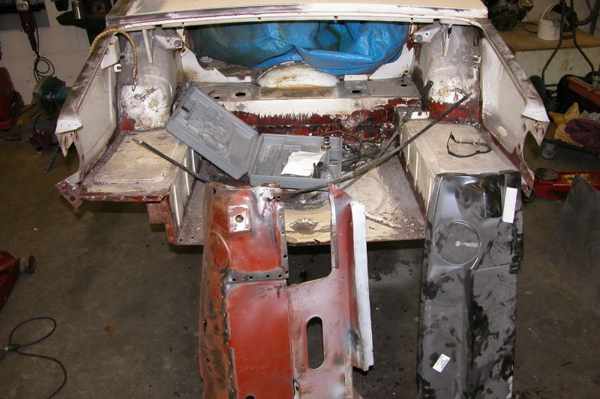
| To continue with our 'rotten' series, the TR tub is up on wheels but not the type you put air into. I found some casters in a recent dumpster dive and they have been put to good use. http://farm1.static.flickr.com/203/519099625_bfac0f5e36_b.jpg This is the last major rust area to fix on the car. Both corners are rusted thru to the inner valance. http://farm1.static.flickr.com/217/519099687_c153a9de05_b.jpg http://farm1.static.flickr.com/226/519099653_ce313fb8fd_b.jpg Here's the question to those who have done this: Is it easier to replace the entire rear end or to piece a new pannel just behind where the bumper would sit? I intend to purchase a new valance but I am wondering what to look out for when separating the welds at the taillight area. Thanks, Tom |
| Tom C |
| Tom, I didn't do a replacement but when I stripped my car down to bare metal I found that my rear valance had been spliced together lengtwise just above the bumper bracket points. What I couldn't tell is if they replaced the top 2/3 or the bottom 1/3. I suspect the top because the bottom portion looks a lot harder to deal with. The car may have had a minor rear end hit at one time. Anyway it looks like the splice method has been done with success. Mine had a nice seam with no rust so I left it that way. Can you get away with splicing just the corners in? Or is there more rust than meets the eye? Just curious.. I'm not a good sheet metal welder. Henry |
| HP Henry Patterson |
| Hi Tom, The project is looking good! I did this job a few years back and replaced the inner lower and outer rear valance. Wire wheel all edges well so that you can see the spot welds, drill out welds and the rear valance will easily separate off the rear. Remember the four welds at each of the bumper mounts. I would not cut and seam the pannel when it is almost as easy to replace the whole unit ... perhaps an hour's extra time involved. Cheers, Rob |
| Rob Gibbs |
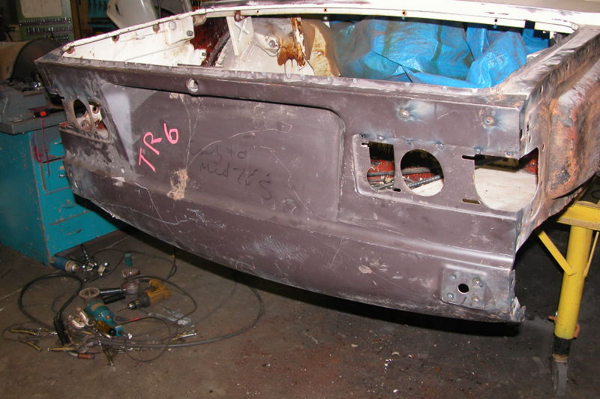
| Hey Henry, I don't think it will be very easy to splice the corners in since this area is raised up and has a curved contour that needs to match the mating rear wings. I don't have a problem on 2D areas like the battery tray or rear deck but this one could be over my head. I peeled away a little bit of the sheet metal yesterday and the rot area is pretty extensive to the point where I can see more rust hidden behind the bumper bracket points. Hi Rob, did you need to brace the left and right sides of the trunk area to prevent the ends from bowing out? There is an inner pannel behind the license plate, where you able to keep it intact or did that need to be removed with the top half of the valance? Also, when you replaced the inner valance, did you fab your own or purchase a new pannel? Thanks for the advice guys. Tom |
| Tom C |
| Tom- Dang, I want to be there to help just to learn. Your killing me!!! |
| DON KELLY |
| Tom, I can't wait to see this car finished. You've done an incredible job rebuilding it. If I remember correctly you didn't realize it needed this much work until you got into it. You sure are going to have a car you can be proud of. Keep those pictures coming. Henry |
| HP Henry Patterson |
| Hi Tom et al, I released the upper-inner panel , then the outer panel, inner lower with the upper off of the car and finally separated the inner two and salvaged the upper portion for the new fit up. The lower inner was replaced along with the outer valance. I did not feel the need to support the side/bottom of the boot and tacked the inner lower in place after the upper inner was attached to the lower first..... does this make sense? finally the otter valance can be tacked into place.... plug welded to be sure. I will attempt to send a few pics here... Cheers, Rob 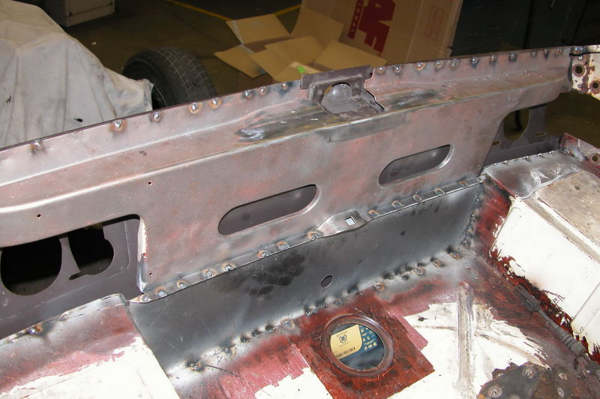
|
| Rob Gibbs |
Crumb... only one came through and I gotta go...
|
| Rob Gibbs |
| do this the long way... |
| Rob Gibbs |
oops.. try again
|
| Rob Gibbs |
the last one...
|
| Rob Gibbs |
Wow you guy's!! I'm jealous of your welding skills. I think I'll join Don and hang around you guys for some learnin'. Someday I'll buy a MIG welder and practice on some old sheet metal. Then maybe I'll do another restoration. Henry |
| HP Henry Patterson |
| Rob, Thanks for the pix, I understand exactly how you tackled this project. One question: did you put any sort of rust protection in the void between the inner and outer valance?. This design is just begging for water and other junk to sit in there and have a feast on the metal. There is a center drain hole but nothing in corners. I may look at adding 2 holes in the inner valance to help drain away anything that seeps in from bumper mounting holes. Henry, Don and others - if you are in the area you are welcome to come over and get your hands dirty, just give me time to get the beer, they still have blue laws here. Wait until I pull the engine, this is something I have no clue about. TC |
| Tom C |
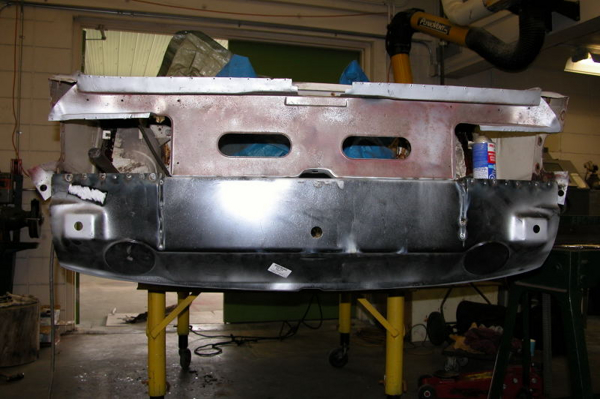
| Tom, I always overlay clean metal with weld-thru primer where I will be plug welding a seam . This is to be followed by a liberal dousing of waxoil after all body work and painting has been completed. The upper inner was bead blasted clean then primed on the inside only before reattaching to the new lower portion. The entire car was media blasted after completion of the gross body work, etch primed, fill primed, base coated then clear coated. Waxoil or the 3M equivalent has been applied to all of the body cavities and will recieve a second coat prior to release onto the roads. Here is a pretty lousy pic of the tub at this point... sitting forlornly in my garage next to the chassis. Cheers again, Rob 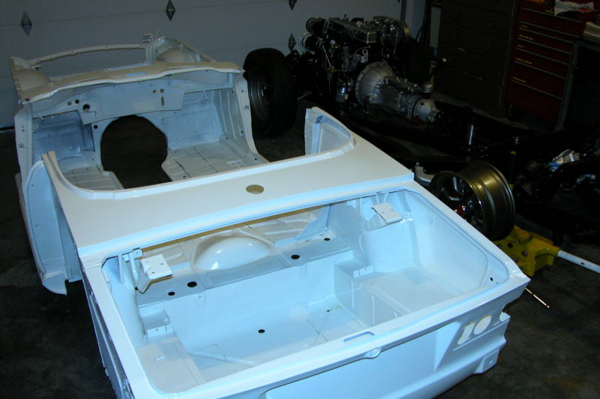
|
| Rob Gibbs |
| Tom, I am close enough to come over. All your photos should be assembled in a TR family album! I enjoy your progress report very much. Paddy 74 sapphire blue, the best color there is |
| Paddy Kan |
This thread was discussed between 29/05/2007 and 31/05/2007
Triumph TR6 index